

A routine filter check once revealed a canister packed with black sludge and almost no water flow, while the tank it served still looked completely clean to the eye. The fish were active, the glass was clear, and nothing seemed wrong. That kind of hidden decline is exactly what makes canister filter maintenance so easy to neglect and so costly when ignored.
A dirty canister filter does more than slow down water movement. It disrupts biological filtration, causes ammonia and nitrite levels to climb, and reduces the oxygen available to your fish. The filter stops being a life support system and starts becoming a source of instability. This guide covers everything you need to know: how the filter works, how to clean it safely, how often to do it based on your specific tank, and what to do when things go wrong.
Table of Content
ToggleUnderstanding Your Canister Filter Before You Touch It
Getting the cleaning process right starts with understanding what is happening inside the filter. Most maintenance errors come from treating a canister filter like a simple mechanical device when it is actually a biological system that requires careful handling.
How a Canister Filter Actually Works
Water enters through the intake, passes through the media in a specific sequence, and exits through the output. That sequence is: mechanical filtration first, then biological, then chemical. Each stage has a defined role, and the order is not arbitrary.
Mechanical media, typically coarse and fine sponges, capture physical waste before it reaches the biological layer. If you reverse the order and place biological media first, it becomes clogged with debris quickly, which reduces its surface area for bacteria and forces you to clean it more often than is safe. Chemical media, such as activated carbon, come last because they work on dissolved compounds that have already passed through the first two stages.
The Bacteria You Must Not Kill
Beneficial bacteria are the foundation of a stable aquarium. They live primarily on biological media such as ceramic rings, bio-balls, and porous matrix material, where surface area is high, and water flow is consistent. These bacteria process ammonia produced by fish waste and convert it first into nitrite and then into the far less harmful nitrate. This process is called the nitrogen cycle, and it is what keeps your tank from becoming toxic.
When you clean a canister filter, your single most important goal is to avoid killing these bacteria. They are sensitive to chlorine, temperature extremes, and complete removal. A tank that has been properly cycled can crash back to an unsafe state within 24 to 48 hours if the bacterial population is significantly disrupted during cleaning.
Signs Your Canister Filter Needs Cleaning
Rather than waiting for a set date on the calendar, watch for these specific indicators:
Reduced outflow or a noticeably weaker spray bar
Cloudy or yellowing water following a recent water change
Unusual grinding or humming sounds from the filter body
Rising ammonia or nitrite readings on a test kit
Visible buildup on the intake strainer
Any one of these is a reliable signal that cleaning is overdue.
What You Need Before You Start
Incomplete preparation is one of the most common reasons filter cleaning goes badly. Having the right tools ready before you begin keeps the process smooth and reduces the risk of accidental mistakes.
Tools and Supplies Checklist
Two dedicated buckets that have never been used with soap or cleaning products
A soft-bristle brush and a toothbrush for the impeller
A flexible tube or hose cleaning brush, which most guides overlook entirely
Clean towels or a waterproof mat for your work surface
Aquarium-safe silicone lubricant for O-rings and gaskets
Spare O-rings matched to your specific filter model
Water conditioner or dechlorinator kept within reach
The One Step Most People Skip
Before you unplug the filter, siphon two to three gallons of water directly from your tank into a clean bucket. This is the water you will use to rinse and swish all of your biological media during the cleaning process. Tap water contains chlorine and chloramine, which kill beneficial bacteria on contact. Using tank water preserves the bacterial colonies that keep your nitrogen cycle intact.
When Not to Clean Your Filter
Timing matters more than most hobbyists realize. Cleaning your canister filter on the same day as a large water change puts two significant stresses on the nitrogen cycle simultaneously. A large water change already temporarily reduces the concentration of the compounds that bacteria feed on. Add a filter cleaning on top of that, and you create conditions for a cycle disruption.
The recommended window is two to three days after a water change. Also, avoid cleaning during an active disease outbreak without following a specific sterilization protocol, which is covered later in this guide.
Step-by-Step Cleaning Guide
Step 1: Shut Down and Disconnect Safely
Unplug the filter from the power source before touching anything else. Close the intake and output valves, or clamp the hoses if your model does not have valves. Place a towel under the hose connections before detaching them, as residual water in the hoses will spill. Carry the canister upright to your cleaning station to avoid disturbing settled debris inside.
Step 2: Disassemble in Order and Photograph First
Take a photo of the filter before you open it. This takes ten seconds and eliminates the frustration of reassembling incorrectly. Release the motor head latches carefully without forcing them, as the housing on most models is plastic and cracks under pressure. Remove the media trays in sequence, keeping them in the exact order they came out. Place each tray into a separate container filled with the tank water you set aside earlier.
Step 3: Clean the Filter Housing and Impeller
Rinse the canister body using only tank water. No soap, no household cleaners, not even a small amount. The impeller is the most commonly skipped component during cleaning, and it is also one of the most important. Remove it carefully, inspect the blades for cracks or chips, clean the shaft with a toothbrush, and check the impeller well for debris buildup. A damaged impeller reduces the flow rate significantly and should be replaced rather than returned to service.
Step 4: Clean the Hoses and Tubing
Hose interiors develop a layer of biofilm over time. This film restricts flow and can harbor harmful pathogens. Run a flexible tube brush through each hose using a gentle back-and-forth motion. Check the hose connectors and locking collars for hairline cracks, as these are a frequent source of small leaks that develop after reassembly.
Step 5: Clean the Filter Media Correctly
This step requires the most care and the most restraint.
Mechanical media (coarse and fine sponges): Squeeze gently in the tank water until the water running through them is mostly clear. Stop before they are completely clean. Some retained material is acceptable.
Biological media (ceramic rings, bio-balls, matrix material): A light swish in tank water is all that is needed. Never scrub biological media. Never clean all of it in the same session. Stagger cleaning across sessions separated by two to four weeks so that a portion of your bacterial population is always left undisturbed.
Chemical media (activated carbon, Purigen): These are replaced on a schedule, not cleaned. Activated carbon exhausts its capacity within two to four weeks and cannot be meaningfully refreshed by rinsing.
Step 6: Inspect and Lubricate O-Rings and Gaskets
A failing O-ring is flat rather than round in cross-section, may show white residue, or will have small surface cracks. These should be replaced before reassembly. Apply a thin coat of aquarium-safe silicone lubricant to O-rings that are still in good condition. Never use petroleum-based lubricants, as they degrade rubber over time and are harmful to fish.
Step 7: Reassemble, Prime, and Restart
Reassemble in reverse order: media trays first, then the motor head, then the hose reconnection. Priming methods vary by model. Some filters have a self-priming button, others require manual siphoning, and some simply need to be filled with water and locked before starting. Once running, listen for the steady hum of normal operation and feel the output flow to confirm water is moving at the expected rate. If the filter will not prime, the most likely cause is an air lock, which is resolved by tilting the canister gently to shift the trapped air toward the outlet.
How Often Should You Clean
Cleaning schedules are not universal. They depend on how much waste your tank produces.
Freshwater community tank: Every six to eight weeks. Adding a pre-filter sponge to the intake can extend this to twelve weeks by catching debris before it enters the canister.
Planted or high-tech CO2 tank: Every eight to twelve weeks. Plants absorb nutrients directly, which reduces the biological load on the filter. Remove activated carbon from these setups, as it strips fertilizers from the water.
African cichlid or heavy bioload tank: Every four to five weeks. These fish produce significantly more waste, which clogs mechanical media quickly.
Marine or reef tank: Mechanical media every three to four weeks. Biological media rarely require attention. Do not run activated carbon continuously in reef tanks, as it leaches dissolved organic compounds back into the water over time.
Regardless of tank type, the most reliable signal to clean is a visible drop in flow rate. Use that as your trigger rather than a fixed date alone.
Common Mistakes and How to Avoid Them
| Mistake | What Goes Wrong | The Fix |
| Using tap water on biological media | Chlorine kills beneficial bacteria, risking a cycle crash | Always use siphoned tank water |
| Cleaning all media in one session | Removes too much of the bacterial population at once | Stagger cleaning by two to four weeks |
| Over-tightening hose clamps | Cracks plastic connectors and causes leaks | Hand-tighten only, then a quarter turn |
| Skipping the impeller | Flow reduction and premature motor wear | Clean and inspect the impeller every session |
| Ignoring the hoses | Biofilm buildup restricts flow and harbors pathogens | Brush hoses with a tube brush each cleaning |
| Cleaning the filter the same day as the water change | Double stress on the nitrogen cycle | Wait two to three days after a water change |
| Not lubricating O-rings | Leaks develop after reassembly | Apply silicone lubricant before every reassembly |
Special Situations
If the Nitrogen Cycle Collapses
An ammonia spike within 24 to 48 hours of cleaning is the clearest sign that too much of the bacterial population was removed. Respond by dosing bottled beneficial bacteria, reducing feeding to once every two days, and performing daily partial water changes of about 20 percent until ammonia and nitrite return to zero. Recovery typically takes one to two weeks, depending on how severely the cycle was disrupted.
Cleaning After a Disease Outbreak
When a disease outbreak has occurred, you face a genuine decision: sterilize fully and restart the cycle, or preserve bacteria and accept some risk of pathogen retention. If full sterilization is necessary, use a 10 to 1 water-to-bleach solution, rinse thoroughly with dechlorinator, and allow all components to air dry completely. For plastic-safe sterilization without bleach, a three percent hydrogen peroxide solution works well and breaks down into water and oxygen without leaving harmful residue.
When You Have Not Cleaned in Six Months or More
Do not clean everything in a single session. Start with mechanical media only and wait one full week before addressing biological media. Expect a temporary minor cycle disruption regardless of how carefully you proceed, and test water parameters daily during that period to catch any ammonia rise early.
Verifying Your Filter Works After Cleaning
The most reliable way to confirm your cleaning was effective is to measure the actual flow rate. Fill a bucket and time how long it takes to reach a known volume, then calculate gallons per hour. Compare this to the flow rate you measured before cleaning. A healthy improvement of 20 to 40 percent is typical after a proper cleaning session.
If flow does not improve, the problem is most likely impeller wear, a kink somewhere in the hose run, or a partial blockage at the intake strainer that was not fully cleared.
Conclusion
Canister filter maintenance is not complicated, but it does require a specific order of operations and an understanding of what you are protecting. The bacteria living in your biological media are the most important component in the entire system, and every cleaning decision should be made with their survival in mind.
The core principles are straightforward: use tank water on biological media, never clean all media in the same session, inspect the impeller and O-rings every time, and let actual flow rate guide your schedule rather than a rigid calendar. These habits, applied consistently, prevent the kind of silent performance loss that goes unnoticed until fish begin showing stress.
A well-maintained canister filter rewards the time invested in it. It runs quietly, stabilizes water chemistry, and removes the guesswork from keeping a healthy tank long-term.
Related Reading
Related Products For Your Reference
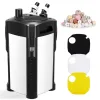
25W 475GPH Canister Filter, Ultra-Quiet External Aquarium Canister...



Add comment
You must be logged in to post a comment.