
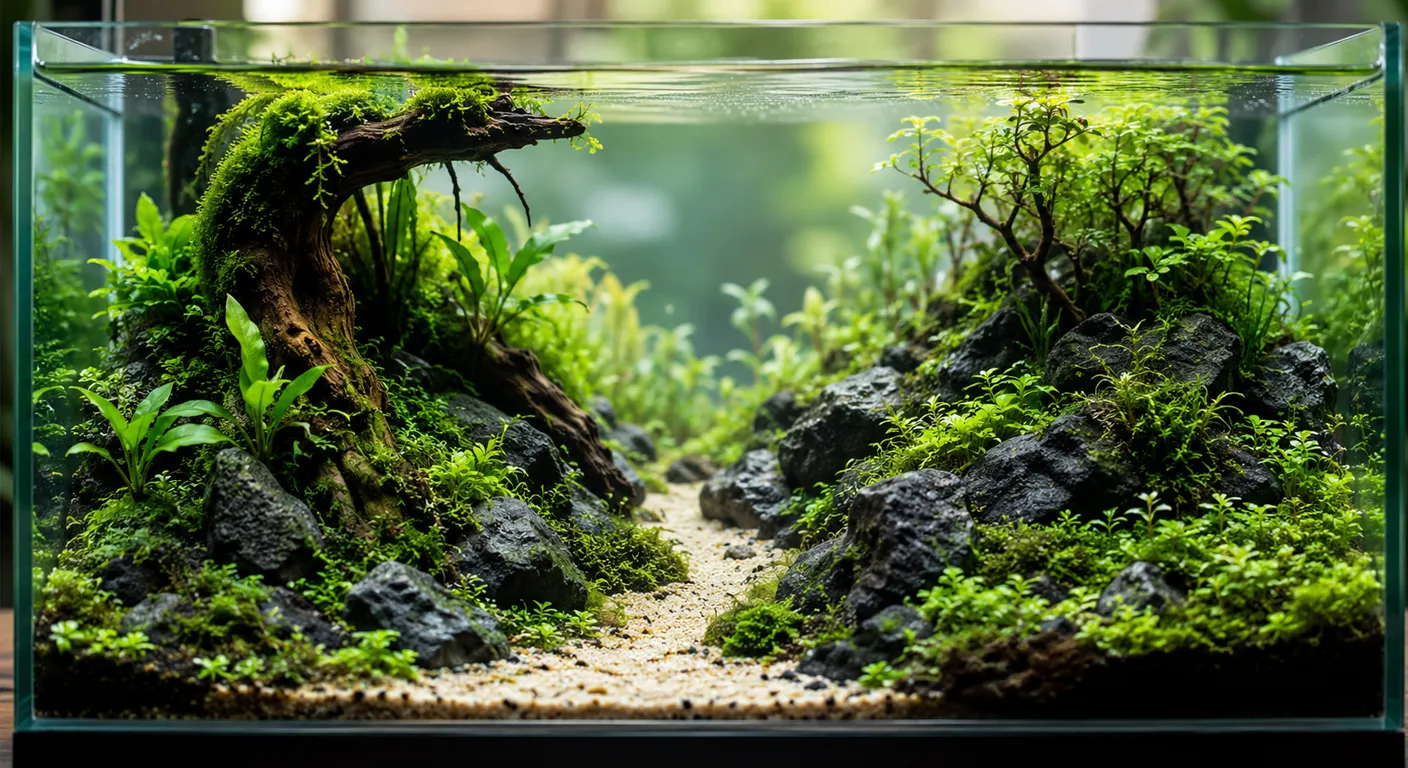
Got a small tank? Good. Because small doesn’t mean boring. A lot of people look at a 10-gallon and think there’s not much you can do with it. That’s completely wrong. A natural nano aquascape is exactly what it sounds like, a miniature natural scene built inside a small tank. We’re not talking about dropping in a plastic castle and some gravel.
The goal is to make it look like a tiny piece of nature. A forest floor. A riverbank. A rocky hillside. Something that looks like it actually exists somewhere in the wild. In the rest of this article we’ll cover how to design one, what you need to get started, and how to keep it looking good long term.
What Is a Natural Nano Aquascape
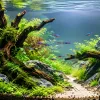
A natural nano aquascape follows one idea, recreate nature, don’t just decorate a tank. Asymmetry. A focal point your eye goes to naturally. Balance that feels intentional without looking forced. It’s a small scene, but it should feel like a real place.
Plants and hardscape do the heavy lifting. Rocks and wood build structure and depth. Plants fill the space and add layers. Done right, a 10-gallon can look like it goes on forever. But natural doesn’t mean messy. Every element has a purpose. Nothing just gets thrown in.
Why Nature-Style Works So Well in Nano Tanks
Small tanks function like miniature landscapes. The limited space actually works in your favor. You’re not trying to fill a room, you’re building a scene. That’s a completely different mindset.
Easier to create a cohesive scene. Fewer gallons means fewer decisions. Everything fits within one frame, one view. It’s simpler to make it all work together.
Small plants and hardscape scale naturally. Tiny mosses, small stones, thin branches, they all look proportional in a nano tank in a way they never would in a 75-gallon.
Composition matters more than tank size. A well-composed 10-gallon beats a poorly planned 100-gallon every time. Size is not the point.
Benefits of a Nature-Style Nano Tank
Relaxing appearance. There’s something genuinely calming about a well-planted natural tank. It doesn’t look like a hobby project. It looks like a window into somewhere quiet.
Strong visual impact. Small tanks sit at eye level, on desks, on shelves. People notice them up close. A natural aquascape at that distance hits differently than a bare tank with plastic decorations.
Budget-friendly. You don’t need a lot of hardscape. You don’t need expensive equipment. A natural nano setup can cost a fraction of what a large aquascape runs.
Easy to enjoy up close. The whole point of a nano tank is that it lives near you. Natural aquascapes reward close viewing. Every detail matters, and every detail is visible.
Planning Your Natural Nano Aquascape
Planning is where most people skip ahead and regret it later. Spend time here, and everything else gets easier.
Choosing the Right Nano Tank Size
5 gallons is the tightest option. Parameters swing fast, livestock options are very limited, and there’s almost no room for error. Best for experienced hands or a single focal plant arrangement.
10 gallons is the sweet spot for most beginners. Stable enough to keep fish or shrimp, enough room to build a proper layout, and still small enough to sit on a desk.
15 gallons gives you more flexibility. More stable water, more plant options, slightly more forgiving if something goes wrong.
Rectangular tanks give more horizontal space to work with, better suited for layouts with depth and flow. Cube tanks are great for single focal point designs, but harder to create depth in.
Choosing a Layout Concept
Walk into a store without a plan, and you’ll buy too much of the wrong stuff. Pick a single visual theme before you purchase anything. One idea. One scene. Stick to it.
Common concepts that work well in nano tanks:
Forest path, tall wood pieces, carpeting, plants along the base, a clear visual path leading into the background
Riverbank sand on one side, rocks and plants on the other, asymmetric and natural
Rocky hill stacked stones as the focal point, low plants around the base
Valley or canyon with two raised sides and a low open center creates strong depth
Root network branching driftwood as the star, plants woven around it naturally
Every layout needs a focal point. One spot where the eye lands first. And a visual flow, a path the eye follows after that. Get those two things right, and the rest falls into place.
Designing the Hardscape
The hardscape is the skeleton of your aquascape. Get this right first. Everything else builds around it.
Choosing Rocks and Driftwood
Less is more. Seriously. One primary rock type. One wood type. Mixing too many materials makes a small tank look chaotic and busy. Pick one and commit.
Scale matters more in a nano tank than anywhere else. One oversized rock can throw off the entire composition. Everything should feel like it belongs at the same scale, like you’re looking at a real landscape from a distance, not a pile of stuff in a small box.
Stick to one rock type: Seiryu stone, lava rock, or dragon stone, all work well
Use one wood type, spider wood, spiderwood, or cholla for fine branching detail
Test arrangements dry before adding substrate. Move things around until it feels right
Popular Layout Styles for Nano Tanks
Triangle Layout
One side high, the other low. That’s the whole idea. Your hardscape and taller plants stack up on one end, and the substrate slopes down toward open space on the other. It’s simple. It works. And that open empty side? It actually makes the planted side look more impressive, not less.
Concave or Valley Layout
Both sides rise up, the center dips low. Like a valley sitting right in the middle of your tank. Run a sand path through that center and plant up the sides and suddenly the whole thing has real depth. Your eye goes straight into it. Hard to get wrong if you commit to the shape early.
Choosing Plants for a Natural Nano Aquascape
Plants are the important part of building a natural nano aquascape. And because of the size of the tank, we need to selecet the suitable ones.
Plant Selection Principles
Favor small-leaf species. Big leaves in a small tank look wrong immediately. Tiny leaves create the illusion of scale, like you’re looking at full-sized trees from far away.
Match plants to your equipment. Low-tech setups without CO₂ need low-demand plants. Don’t pick plants that your lighting and filtration can’t support.
Limit species. Three to five plant species are enough. More than that, and the tank starts looking like a collection rather than a scene.
Foreground, Midground, and Background Roles
Foreground
This is the front of the tank closest to the glass. Keep it low. Carpeting plants like Monte Carlo, dwarf hairgrass, or moss work here. The foreground frames the whole scene and creates the illusion of ground.
Midground
This is where detail lives. Small bushy plants, attached mosses, and low-growing stems. The midground connects the foreground to the background and adds texture. Anubias nana petite and Java moss are reliable choices here.
Background
Taller plants go here, but not too tall. In a nano tank, background plants only need to be a few inches taller than midground. Rotala, needle leaf java fern, or thin stem plants work well. The background adds depth and closes off the scene.
Step-by-Step: Building the Aquascape
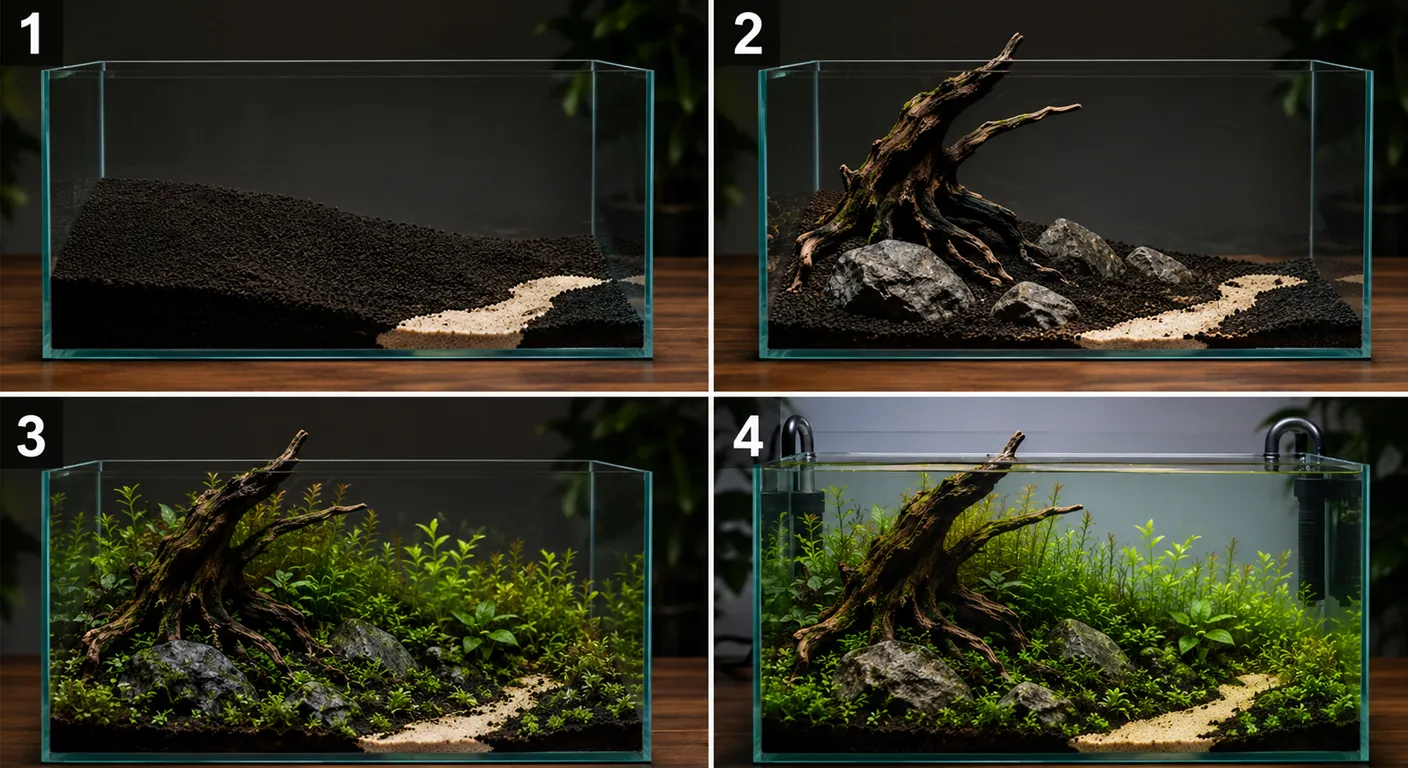
Step 1. Add and Shape the Substrate
Don’t lay it flat. Slope the substrate higher toward the back and lower toward the front. This creates depth and makes the tank look larger than it is. Aim for about an inch at the front and three to four inches at the back.
If you’re using sand, position it now, usually in open foreground areas or along a path. Use a divider or carefully placed rocks to keep it separated from the soil.
Step 2. Build the Hardscape
Place your largest focal piece first. This is your anchor; everything else responds to it. Don’t center it. Place it slightly off to one side, about one-third of the way in.
Step back and look at it. Adjust until the balance feels natural. Add secondary pieces around it, smaller rocks or wood, to support the composition without competing with it. Less is always better at this stage.
Step 3. Plant the Aquarium
Plant from back to front. Start with background plants, then midground, then foreground last.
Press roots firmly into the substrate, don’t just rest them on top
Attach mosses and rhizome plants like anubias or ferns directly to rocks or wood using thread or glue
Plant densely from the start. It looks crowded at first. It won’t stay that way. Dense planting suppresses algae early on and gives the tank a head start
Step 4. Fill and Start the Tank
Fill slowly. Pour water onto a rock or your hand to diffuse the flow. Directly pouring disturbs the substrate and moves everything around.
Once filled, start the filter and heater. Set your lighting schedule right away. Eight to ten hours per day is a solid starting point. Don’t adjust it constantly. Pick a schedule and stick to it from day one.
Maintaining a Natural Nano Aquarium
Weekly
Do a 20–30% water change. Small tanks drift fast. Consistent water changes are the single most important maintenance habit.
Trim fast-growing plants before they shade out slower ones
Remove any dead leaves or decaying material before it breaks down in the water
Wipe the inside of the glass; algae builds up fast at close viewing distances
Monthly
Deep clean the substrate with a gentle gravel vacuum around plant roots
Check filter flow and clean media if output has dropped
Reassess plant growth, thin out anything that’s taking over, and replant sparse areas
Check hardscape for algae buildup and scrub if needed
Common Nano Aquascaping Mistakes
Using too many plant species. Five is enough. More than that, and the tank loses its sense of theme. It starts looking like a plant store, not a landscape.
Oversized hardscape. One rock that’s too big throws off the entire scale. Everything should look like it belongs in the same miniature world.
Centering the focal point. Dead center kills visual interest immediately. Off-center compositions always look more natural and more dynamic.
Skipping the planning stage. Buying plants and rocks without a layout concept first almost always leads to a cluttered, unfocused tank.
Changing the lighting schedule constantly. Inconsistent light confuses plants and invites algae. Set a schedule and leave it alone.
Understocking plants at the start. A sparse tank in the early weeks is an algae tank. Plant heavily from day one and thin later as things fill in.
Conclusion
Building a natural nano aquascape isn’t complicated. It just takes preparation. Pick a concept, plan the layout, choose the right hardscape, plant in layers, and fill carefully. Follow those steps, and the hard part is mostly done before the water even goes in.
Planning and restraint are what separate a good aquascape from a cluttered one. Fewer materials, fewer species, one clear focal point. Stay consistent with maintenance, and the tank rewards you for it week after week. A small tank is not a limitation. It’s a canvas. Go build something.
FAQs
1. How Much Does a Natural Nano Aquascape Cost?
Honestly, not that much. If you’re smart about it, a solid 10-gallon setup can come together for $80 to $150. The light will eat most of that budget.
2. What is the best tank size for a natural nano aquascape?
10 gallons is where most people should start. It’s forgiving enough to learn on and small enough to actually manage.
3. Can I create a nano aquascape without CO₂?
Yes, and plenty of people do. Just pick plants that don’t need it: Java moss, anubias, and Java fern. Throw in some liquid fertilizer once a week, and you’re set.



Add comment
You must be logged in to post a comment.