

If you’ve spent any time keeping tropical fish, you already know the dread: you walk past the tank, and the thermometer reads five degrees too cold. Commercial heaters crack, stick, or quit. Often at the worst possible moment. And the decent ones? They’re not cheap. A reliable submersible heater from a well-known brand can run $40 to $80, and there’s still no guarantee it won’t fail on you mid-winter.
So after losing a fish I’d had for three years to a heater malfunction, I decided to build my own. The total cost came to just under $15 in parts. It’s been running flawlessly for six months now, and I understand exactly how it works, which means I can fix it if something ever goes wrong.
In this guide, I’ll show you exactly how to build a DIY aquarium heater from scratch, even if you’ve never wired anything before. The process is simpler than it sounds, and the result is a fully customizable, dependable heating solution tailored to your specific tank.
Table of Content
ToggleWhat you’ll get from this tutorial
-
A fully waterproof, customizable aquarium heater
-
Precise temperature control via an adjustable thermostat
-
Total cost: $10–$20 depending on tank size
-
Build time: Under 1 hour
Read This Before Anything Else
Water and electricity are a dangerous combination. This project is completely safe when done correctly, but shortcuts can be fatal — for you and your fish. Use only waterproof-rated components, follow every sealing step, and never leave a newly built heater running unattended during its first 48 hours. If anything smells like burning or the temperature climbs unexpectedly, unplug it immediately. Your fish depend on you getting this right.
What You’ll Need
|
Item |
Purpose |
Estimated Cost |
|
Waterproof heating element (aquarium-rated) |
Generates heat |
$5–$10 |
|
Waterproof thermostat (e.g., W1209 module) |
Controls temperature |
$3–$6 |
|
Plastic or ABS enclosure box |
Protects components |
$2–$4 |
|
Waterproof electrical cable + plug |
Powers the unit |
$2–$3 |
|
Waterproof silicone sealant |
Seals all entry points |
$1–$2 |
|
Insulating tape |
Reinforces wire junctions |
~$1 |
|
Tools: screwdriver, wire stripper |
Assembly |
(you likely have these) |
Sizing tip: As a general rule, plan for 5 watts of heating power per gallon of water for tanks kept in a normal room-temperature environment (68–72°F). If your home runs cold in winter, bump that up to 8–10 watts per gallon to give the heater enough headroom.
Step-by-Step Build Guide
Here are details for your reference:
Step 1 : Choose and Test Your Heating Element
The heating element is the heart of the whole build, so it’s worth spending a few extra minutes getting this right before anything else. When shopping, look for elements rated IP67 or IP68. These certifications mean the component is waterproof to a depth suitable for home aquariums, and they’re the only kind you should ever submerge.
Before you assemble anything, do a quick standalone test: connect the element to a power source briefly and confirm it heats up. A faulty element is trivially easy to swap out now and a genuine headache after full encapsulation.
Step 2: Wire the Thermostat to the Heating Element
The thermostat is the “brain” of your heater. It continuously monitors the water temperature through a probe and automatically cuts power to the heating element once the water reaches your target temperature — then switches it back on when the temperature dips below that threshold. This cycling is what keeps your tank stable.
Wiring sequence:
-
Connect your power supply cable to the thermostat’s input terminals
-
Run a wire from the thermostat’s output terminals to the heating element
-
The temperature probe. Usually a thin wire with a small sensor tip — should extend out of the enclosure and into the water column, away from the heater itself
The W1209 thermostat module is a popular choice for this project because it’s inexpensive, accurate to ±1°C, and clearly labeled. The wiring diagram is printed right on the board, which makes this step straightforward even for beginners.
Set your target temperature before sealing. For most tropical freshwater fish — bettas, tetras, gouramis — aim for 76–80°F (24–27°C). Discus and some other species prefer it warmer, closer to 82–86°F. Look up the specific needs of your fish if you’re unsure.
Step 3: Encapsulate Everything
This is the most important step in the entire build, and it’s where most DIY heater failures happen. Rushing the sealing process is what causes shorts, corrosion, and water damage over time.
-
Mount the heating element and thermostat securely inside your plastic enclosure box
-
Route all wires through the enclosure’s entry holes, then fill every gap with waterproof silicone sealant — not just insulating tape
-
Let the silicone cure for a full 24 hours before the heater goes anywhere near water; silicone that hasn’t fully cured won’t form a reliable seal
-
Wrap all wire junctions and exposed terminals with insulating tape as a secondary protective layer
The most common mistake here is sealing the enclosure body but forgetting the wire entry points. Those holes are exactly where water will creep in if left unaddressed. Apply sealant generously, smooth it flush, and let it dry completely. Patience here is what separates a heater that lasts years from one that fails in weeks.
Step 4: Dry Test Before Water Contact
With everything sealed and fully cured, plug in your heater and run it in open air for 10–15 minutes before it ever touches water. This is your safety check, and it’s non-negotiable.
During the test, confirm:
-
The thermostat display shows a temperature reading
-
The heating element warms up when below the set temperature
-
The heating element switches OFF once the target temperature is reached
-
No burning smell, no sparking, no unusual behavior
If anything seems off, unplug immediately and trace back through your wiring. Much easier to troubleshoot now than after the heater is installed in a tank full of fish.
Step 5: Install in Your Aquarium
Where you place the heater inside the tank matters more than most people realize. Poor placement leads to cold spots and uneven heating, which stresses fish even if the average temperature looks correct on the display.
Placement best practices:
-
Position the heater near the filter outlet so warm water gets pushed throughout the tank immediately
-
Mount it horizontally along the back wall. This gives the most even heat distribution
-
Keep at least 1 inch of clearance from the substrate to allow water circulation around the element
-
Place the thermostat probe in the middle of the tank, well away from the heater. If the probe sits right next to the element, it will read artificially high and cause the unit to undercut your actual heating
As you route the power cable out of the tank, create a drip loop — a downward curve in the cable before it reaches the outlet. This simple trick prevents water from running along the cable and into your wall socket.
Monitoring the First 48 Hours
Keep a close eye on things when you first fire up your new heater. Check the temperature every few hours using a separate thermometer independent from the thermostat probe — this lets you verify the probe reading is accurate and that the tank is genuinely stabilizing at the target level.
Normal behavior is a gentle cycling: the heater turns on, warms the water a degree or two, then clicks off. If the heater runs continuously and the temperature keeps climbing past your set point, turn it off — your wattage is likely too high for the tank volume. If it cycles correctly but never quite reaches the target temperature, your room may simply be too cold; consider adding foam insulation panels to the back and sides of the tank to reduce heat loss.
Troubleshooting Quick Reference
|
Problem |
Likely Cause |
Fix |
|
Temperature won’t reach target |
Underpowered element |
Use higher-wattage element |
|
Temperature overshoots |
Probe placed too close to heater |
Reposition probe to center of tank |
|
Heater runs constantly |
Undersized wattage or cold ambient |
Add insulation or upgrade element |
|
Thermostat display is off |
Loose wire at input terminals |
Check and re-secure connections |
How This Compares to Store-Bought Heaters
|
DIY Heater |
Commercial Heater |
|
|
Cost |
$10–$20 |
$25–$80 |
|
Customizable wattage |
✅ Yes |
❌ Limited options |
|
Repairability |
✅ Easy |
❌ Usually not repairable |
|
Warranty |
❌ None |
✅ Typically 1–2 years |
|
Build time |
~1 hour |
0 (plug and play) |
The DIY route wins on cost and flexibility. The trade-off is that quality control falls entirely on you — which is exactly why following every step of this guide matters.
FAQ
1. Is a DIY aquarium heater safe for fish?
Yes. When built with IP-rated waterproof components and fully cured sealant. The risks come from using non-waterproof parts or skipping the sealing steps, not from the concept itself.
2. What’s the best wattage for my tank size?
Use 5 watts per gallon as your baseline. For a 10-gallon tank, that’s 50W; for a 20-gallon, 100W. Add 20–30% more if your home gets cold in winter.
3. Can I use this for a saltwater tank? Yes, but use marine-grade or heavily coated heating elements, since saltwater is significantly more corrosive than freshwater. Inspect all seals every 3–4 months.
4. How long will it last? With quality components and proper sealing, expect 2–4 years of reliable use. Check the sealant every 6 months for any cracking or shrinkage and reseal as needed.
Conclusion
Building your own aquarium heater isn’t just about saving money — it’s about understanding your tank’s systems well enough to fix them when something goes wrong. That knowledge and confidence are genuinely worth a Saturday afternoon.
Got questions about your specific setup? Drop them in the comments with your tank size, fish species, and room temperature — I’ll help you figure out exactly the right wattage for your build.
Related Reading
Related Products For Your Reference
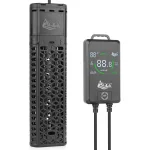
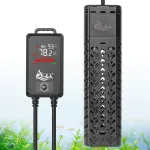
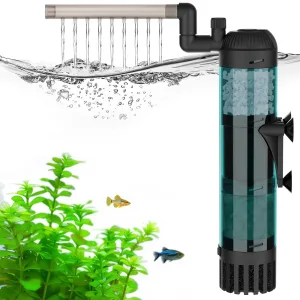
800W AQQA Aquarium Heater, Submersible Fish Tank Heater...
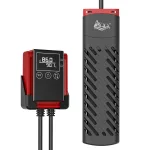
100W Aquarium Heater for 8-20 Gal Tanks with...


Add comment
You must be logged in to post a comment.